# 75/35T (CH347) Flashing Guide
{% hint style="info" %}
Flashing should only be done on second PC. NOT the Gaming PC
{% endhint %}
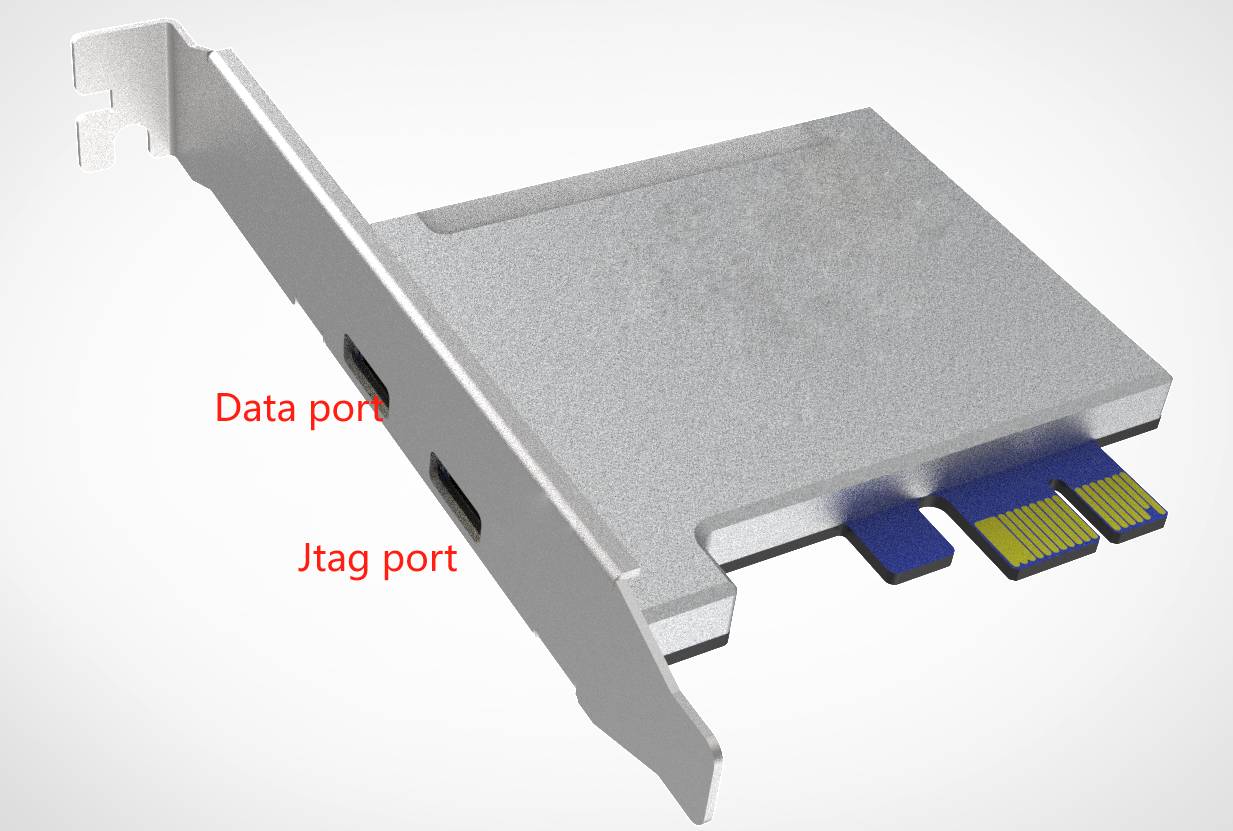
## **Step 1. Connect to the JTAG Port**
1. **Locate the JTAG port** on the DMA card.
* This is the port **closest to the motherboard**.
2. **Power down the main computer completely** before making any changes:
* Shut down the system.
* Flip the **power supply switch to the OFF position**.
* Press the **power button on the case several times** to discharge any remaining electrical energy from the capacitors.
3. **Connect the JTAG cable** securely between the JTAG port on the DMA card.
{% hint style="warning" %}
> ⚠️ **Important:** Never connect or disconnect the JTAG cable while the computer or card is powered. Doing so may damage the hardware or corrupt the firmware.
> {% endhint %}
***
## Step 2. Download Flash Files
1. Download the required files from the link(s) below.\
\> Flashing Driver: [**Download**](https://drive.proton.me/urls/AGX6SA9SGC#cZRlDaeqzRo7)\
\> Flashing Tool: [**Download**](https://drive.proton.me/urls/YK8DX34KQR#7msTX1E8fJA9)
2. Save the files to a known location on your computer (e.g., `C:\DMA_Flash_Files`).
***
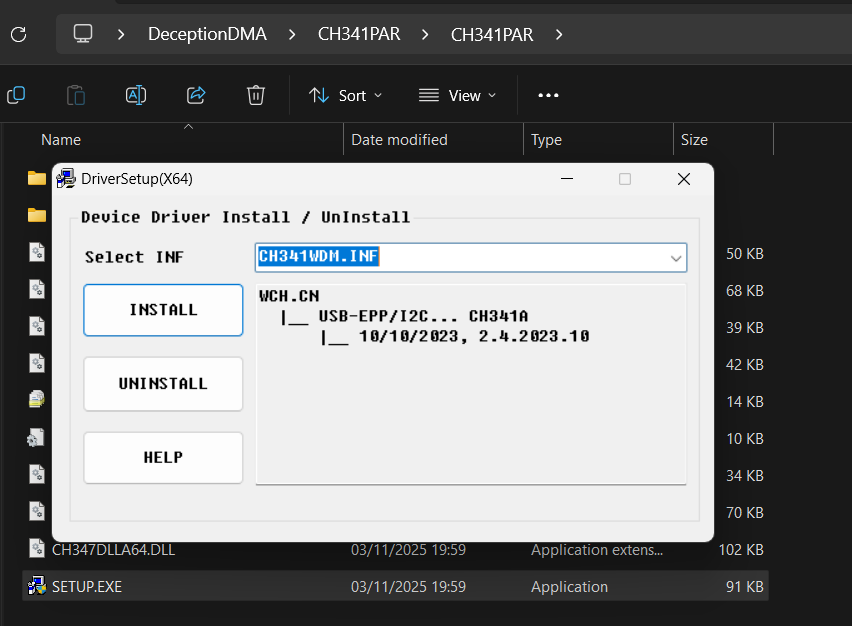
## Step 3. Install JTAG Drivers
1. Open the **CH341PAR** folder
2. Navigate to the **SETUP.exe** file.
3. **Right-click** and select **Run as Administrator**.
4. Click **Install** as shown in the installation prompt.
5. Open **Device Manager** and confirm that you see;
***
## Step 4. Launch FPGA Tool
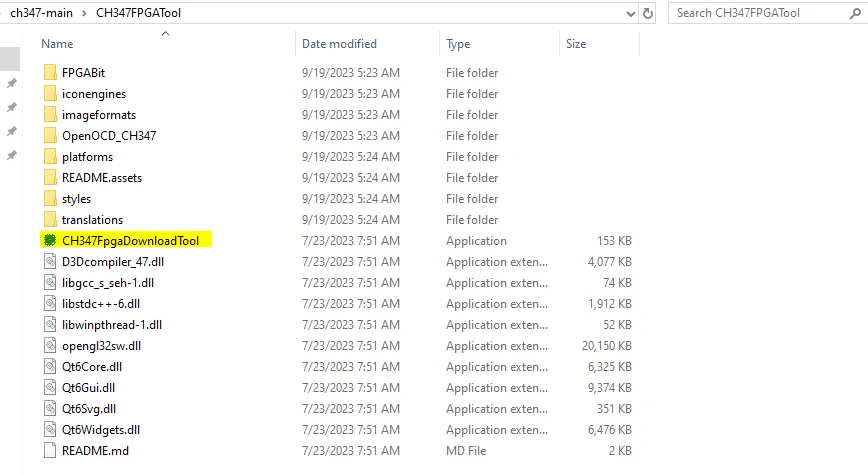
1. Open the **CH347-main** folder.
2. Navigate to the **FPGATool** folder.
3. Right-click **CH347FpgaDownloadTool** and choose **Run as Administrator**.
***
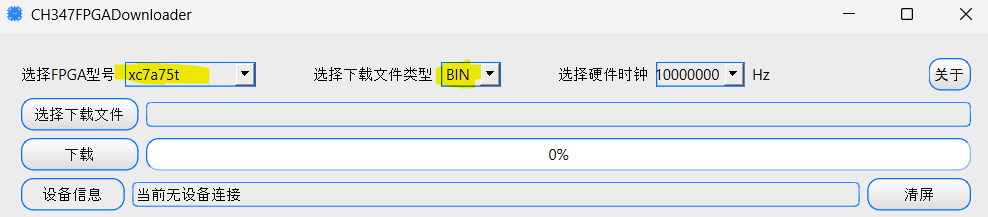
## Step 5. **Select the Correct Chip**
1. In the FPGADownloadTool interface, change the **first** and **second dropdowns** to match the chip you are flashing:
* `xc7a35t` → for 35T
* `xc7a75t` → for 75T
***
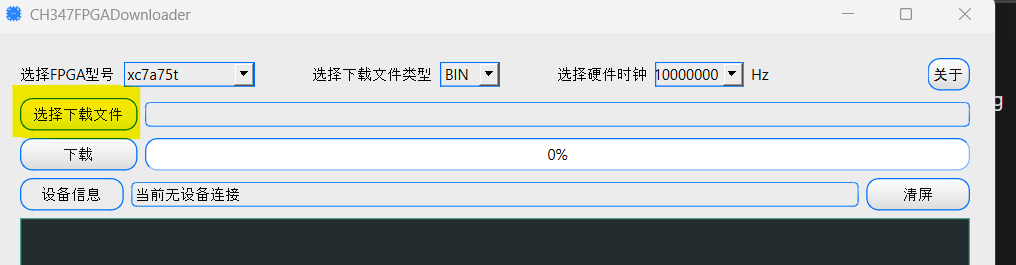
## Step 6. Choose the Firmware File
1. Click the **file selection field** (highlighted in the image below, if available).
2. Navigate to and select your firmware file.
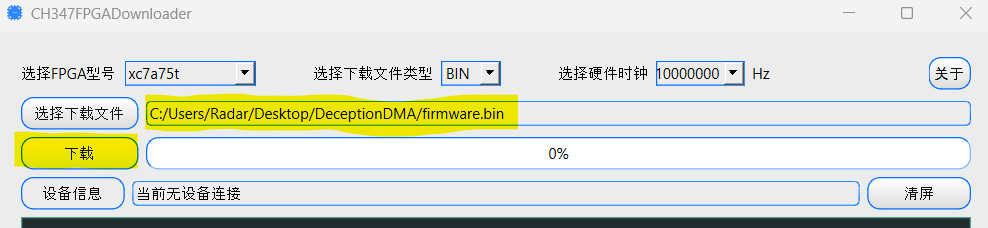
3. Ensure there are **no spaces** in the file path or directory name.
* Example: `C:\DMA_Flash_Files\firmware.bin` ✅
* Example: `C:\DMA Flash Files\firmware.bin` ❌
***
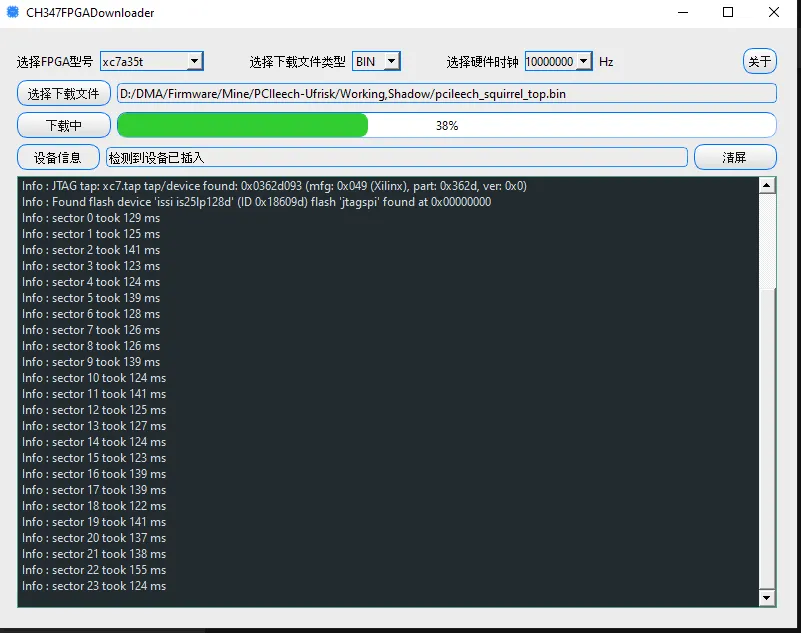
## Step 7. Begin Flashing
1. Click the **Download** button (highlighted below).
2. Allow the flashing process to complete — **do not disconnect or power off** during this time.
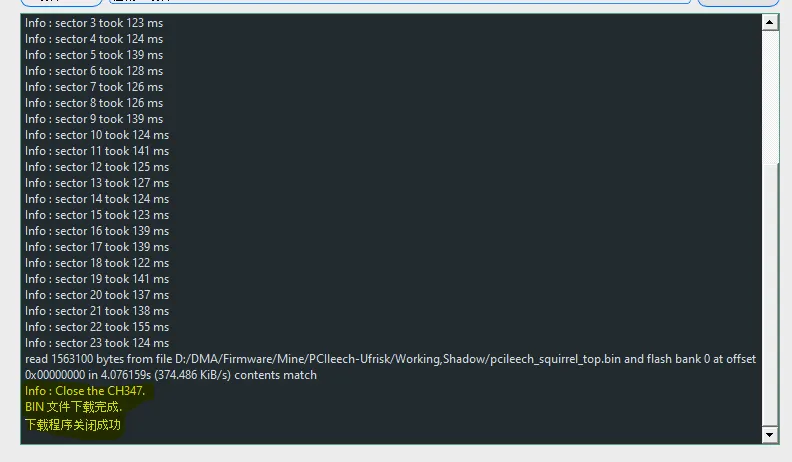
> ⚠️ Even if the progress bar reaches 100%, the flash may still be finalizing.\
> Wait until you see the message:
>
> ```
> Info: Close the CH347
> ```
before continuing.
***
### **Step 8: Troubleshooting Flash Errors**
If you encounter an error such as:
```
jtagspi_init_chain_id proxy_bit
```
or any similar error message:
1. Rename your firmware file to `firmware.bin`.
2. Move both the **firmware file** and the **flash folder** to the root of your C: drive.
* Example: `C:\firmware.bin` and `C:\flash\`
Then retry the flashing process.
***
### **Step 9: Power Cycle and Switch to Data Mode**
1. After flashing completes successfully, **power off your secondary PC**, then **power off your main PC**.
2. Flip the **power supply switch to OFF** and press the **power button** a few times to drain residual power.
3. **Switch the USB-C cable** from **JTAG** to **DATA**.
4. Power on your **main PC first**, followed by your **secondary PC**.
***
## Step 10: **Clean Up Old Firmware Files**
* On your M**ain PC**, remove any previous firmware traces.
* Download and run the **Ghost Device Cleaner** `.bat` file.\
\&#xNAN;*(*[*Ghost Device Cleaner*](https://drive.proton.me/urls/T39MFAT85M#REBHfryG0ais)*)*
* Follow the on-screen prompts to complete the clean up.
.webp?alt=media&token=8037687c-805d-4a05-8fa6-573d2806b474)